
Desert Vans / Mesa Riser

Add more solar over the A/C unit.
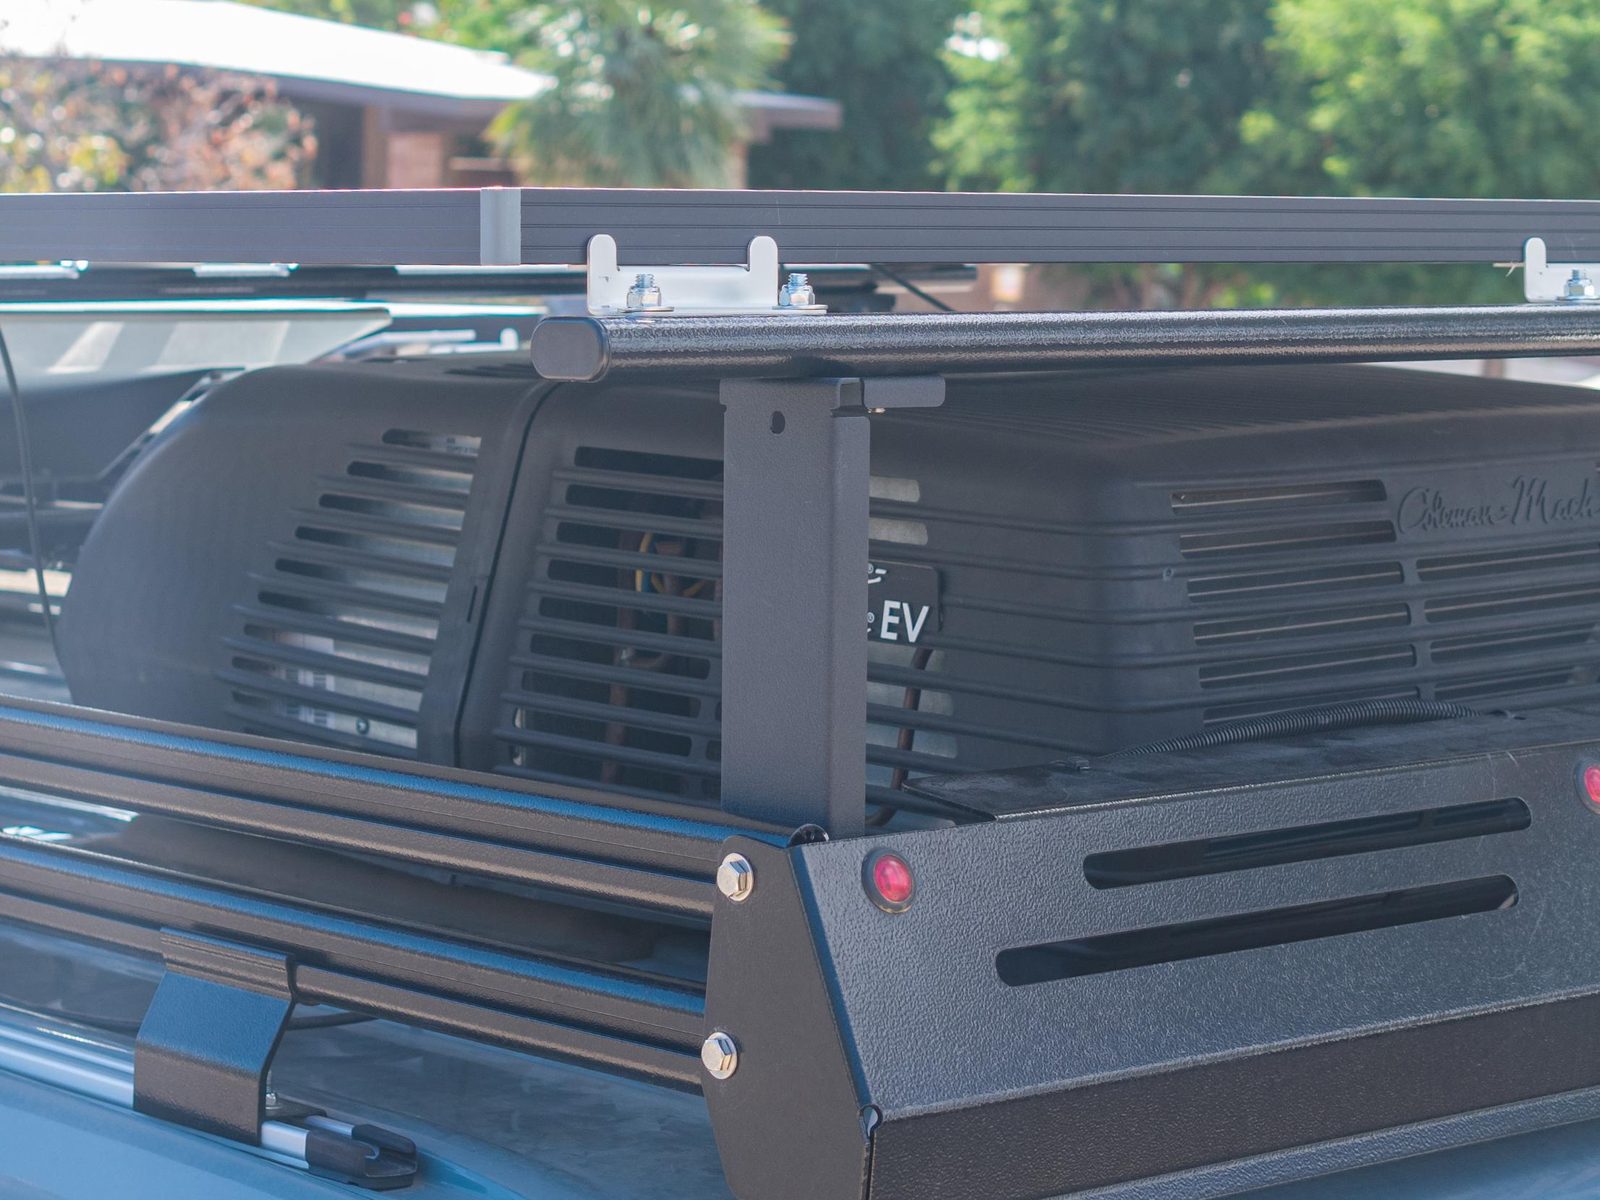
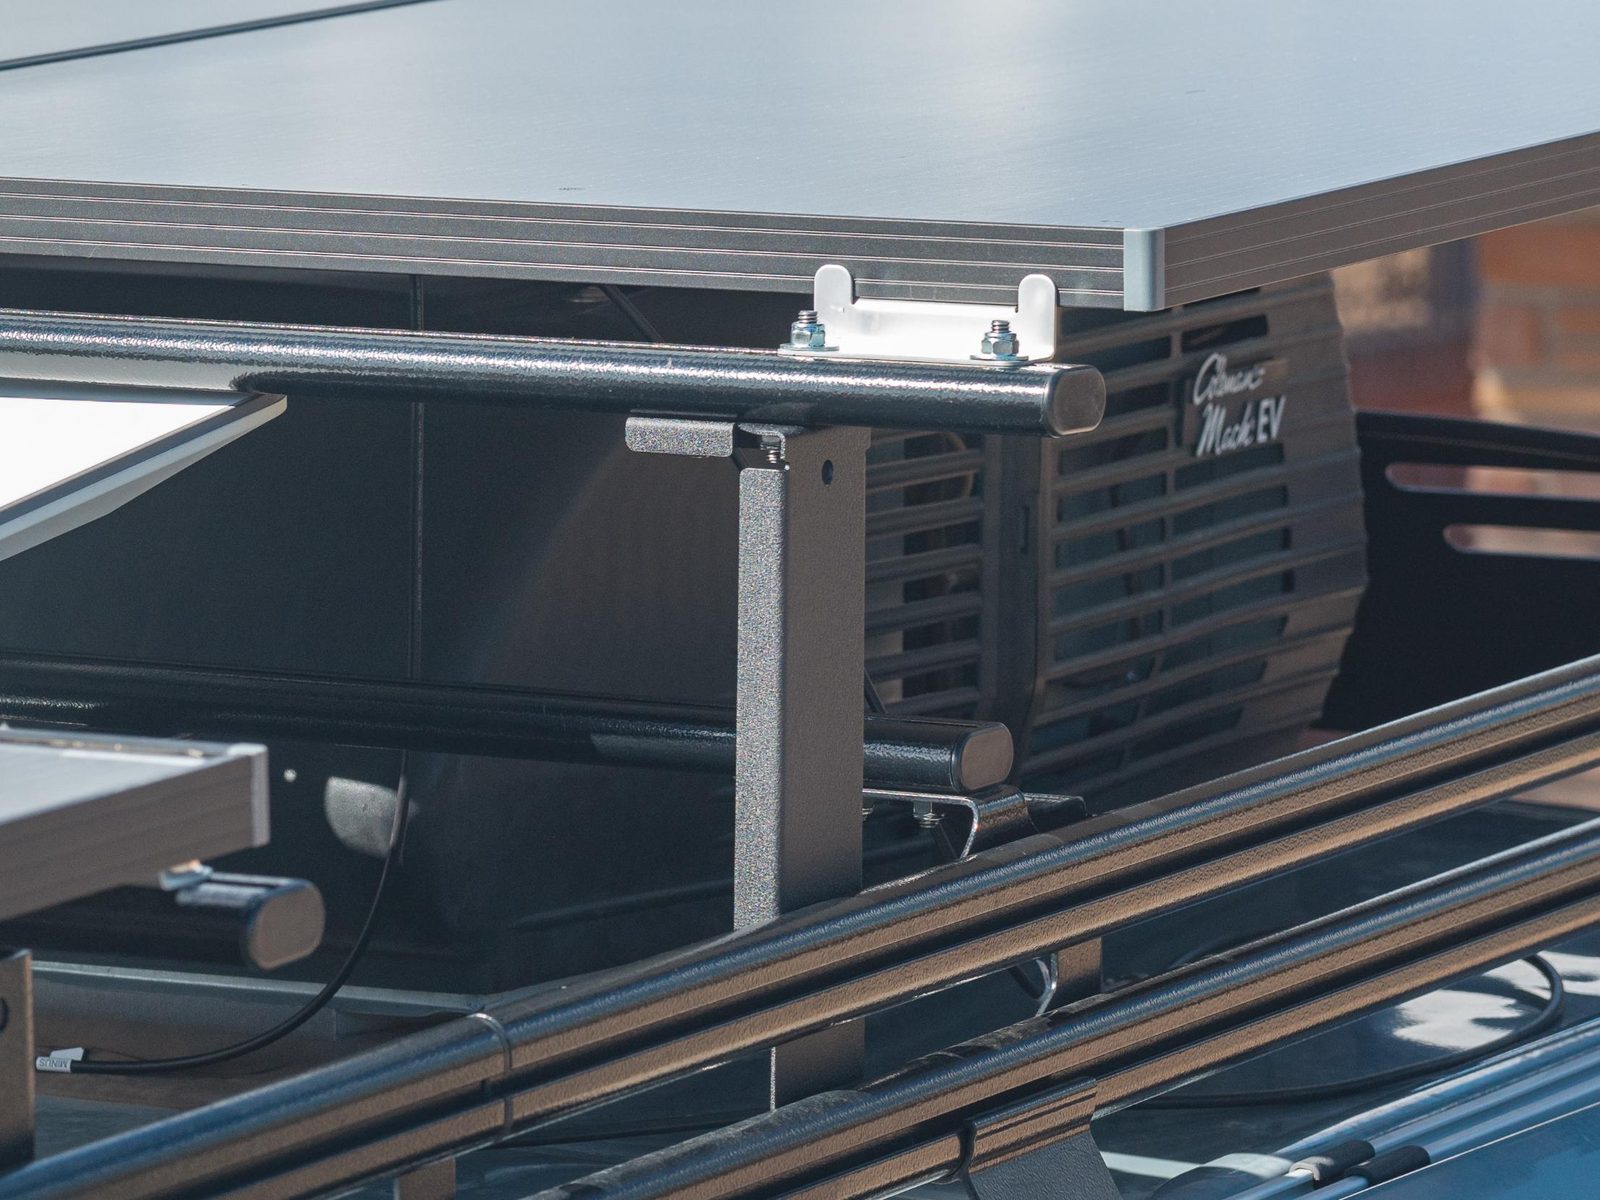
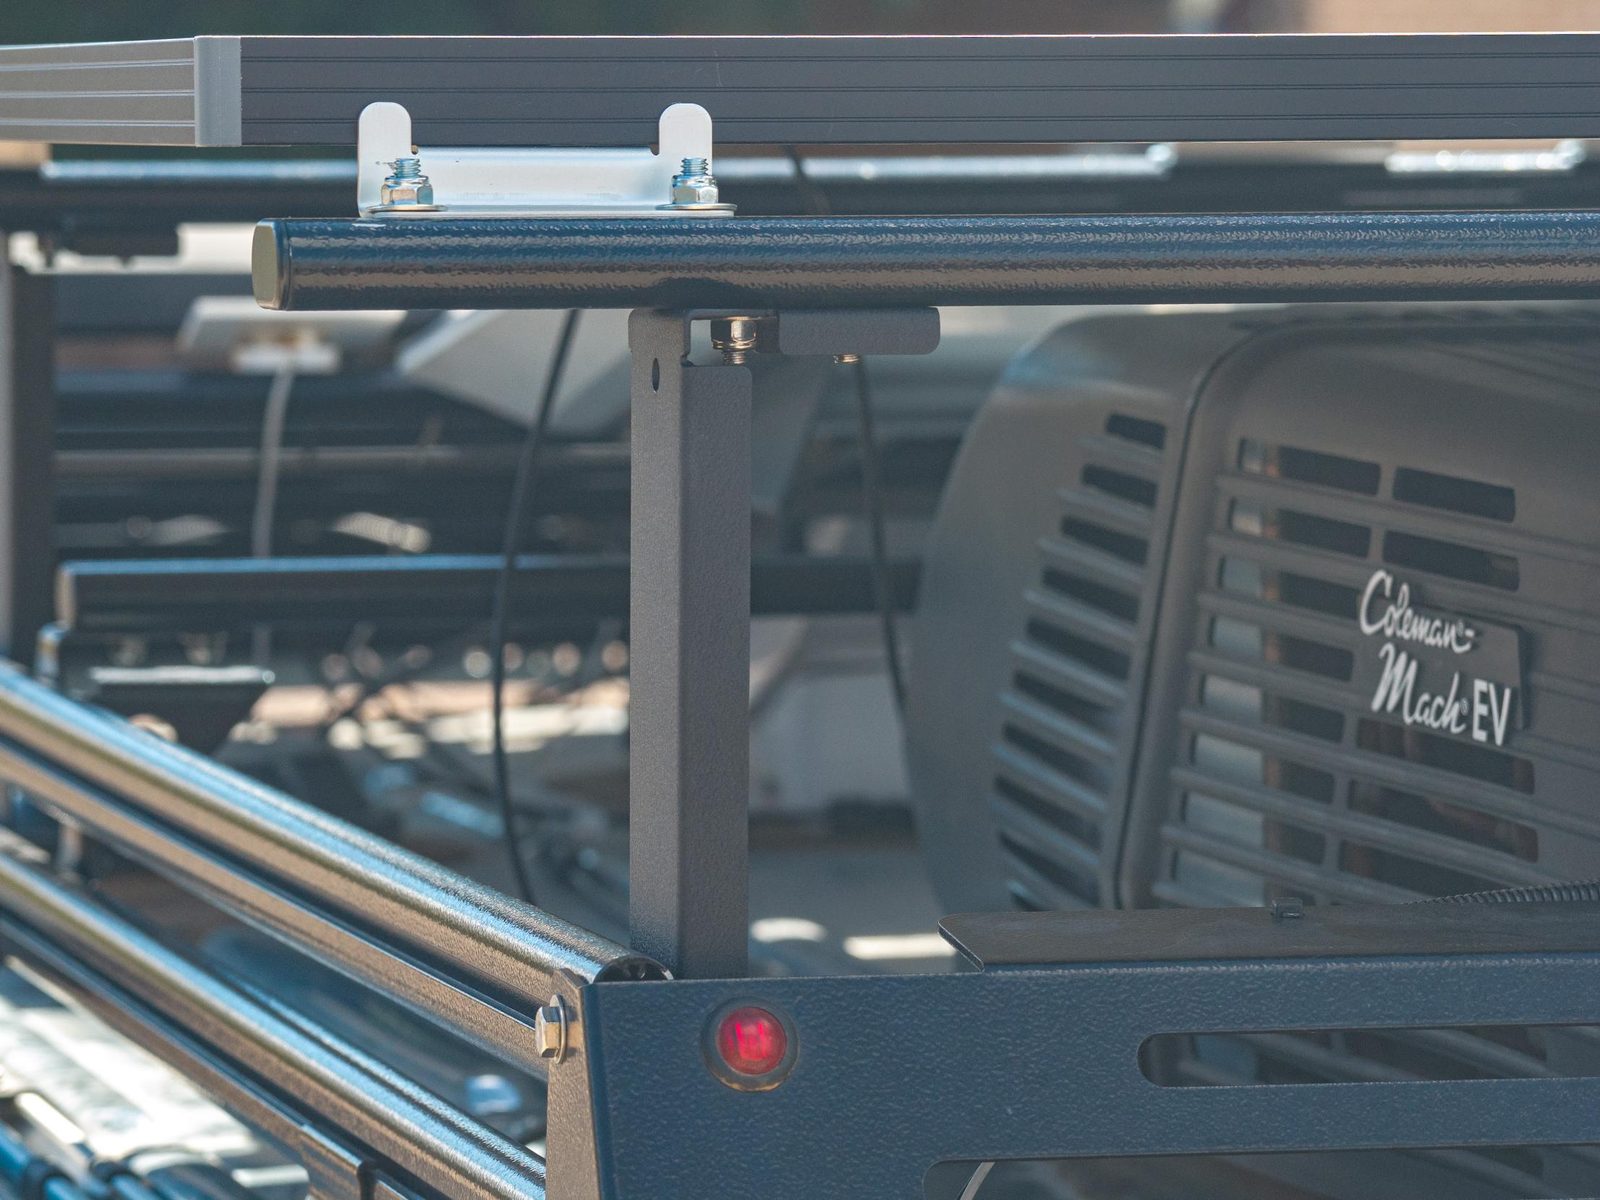
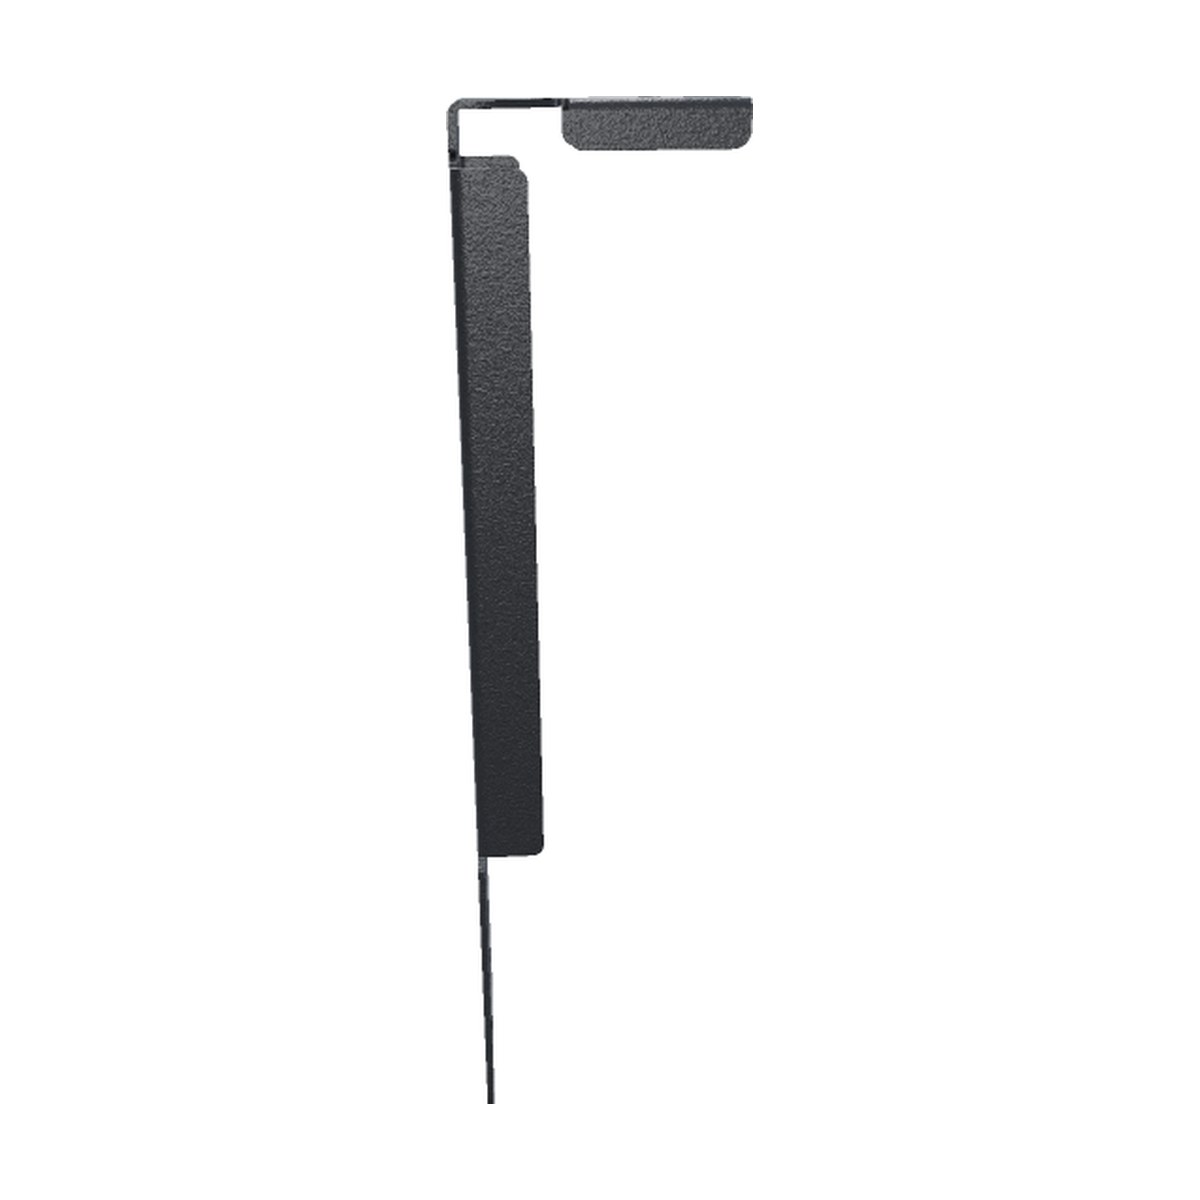
The Desert Vans™ Mesa Riser raises your solar panels nearly 8" so you can mount them over your A/C and add power on roof space that was unavailable before.
Crossbars and mounting hardware are sold separately. See “What you’ll also need” below, and check your rack before you buy.
The big benefit
Put more solar on your roof, over the space blocked by your A/C.
The A/C unit takes up some of the best roof space on a van, and most of us end up with room for fewer panels than we want. Desert Vans™ risers raise your crossbars nearly 8" above your existing rack, so your panels install over the A/C. That turns a section of roof that was unavailable into roof you can use, so you can add panel area and more solar capacity.
Makes unavailable roof space usable
The roof over your A/C can’t hold panels today. Risers raise your panels so they install over the unit, and that space can work for you.
More panels, more power
More panel area on the same roof means more charging for your batteries on every sunny day.
Room for your other gear
With the front and rear risers set apart, there is room between the panel pairs for gear such as a satellite internet dish.
Easy to install
The brackets bolt to your existing rack, with no drilling into your roof.
Real-world example
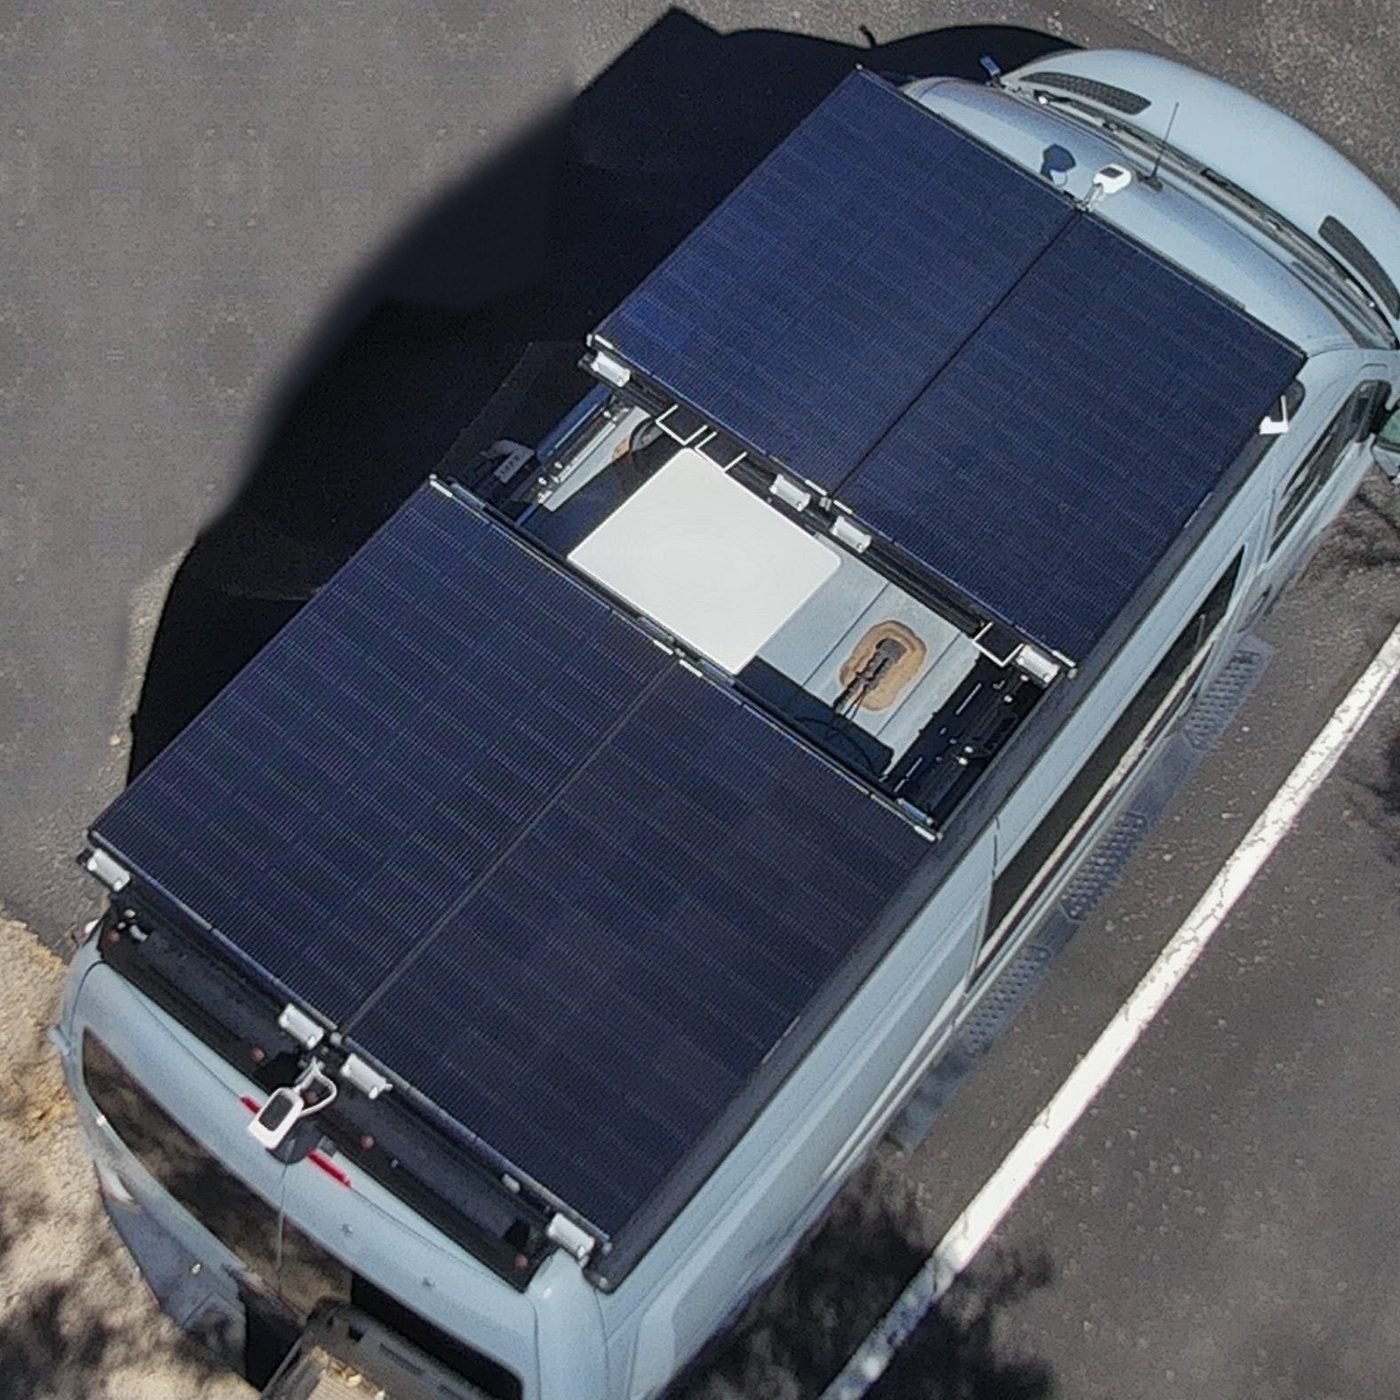
One van, four times the solar.
This Class B van left the factory with 200W of solar. Two 200W panels filled the front of the roof, the most that would fit, bringing it to 400W. Desert Vans™ Mesa Risers then made the roof over the A/C usable. Two more 200W panels now install there, over the A/C at the rear, for a total of 800W. A Starlink Gen 2 High-Performance dish still fits between the front and rear pairs of panels.
Results depend on your roof, your A/C, and your panels.
And a few bonuses
A shaded A/C and a cooler roof
Panels over the A/C block direct sun on the unit and the roof around it. Shaded metal soaks up less heat, so less of it gets inside.
Airflow under the panels
Raised panels get air moving beneath them, which carries heat away. Cooler panels also make more power.
Rugged, simple design
One piece of steel. No welds to crack.
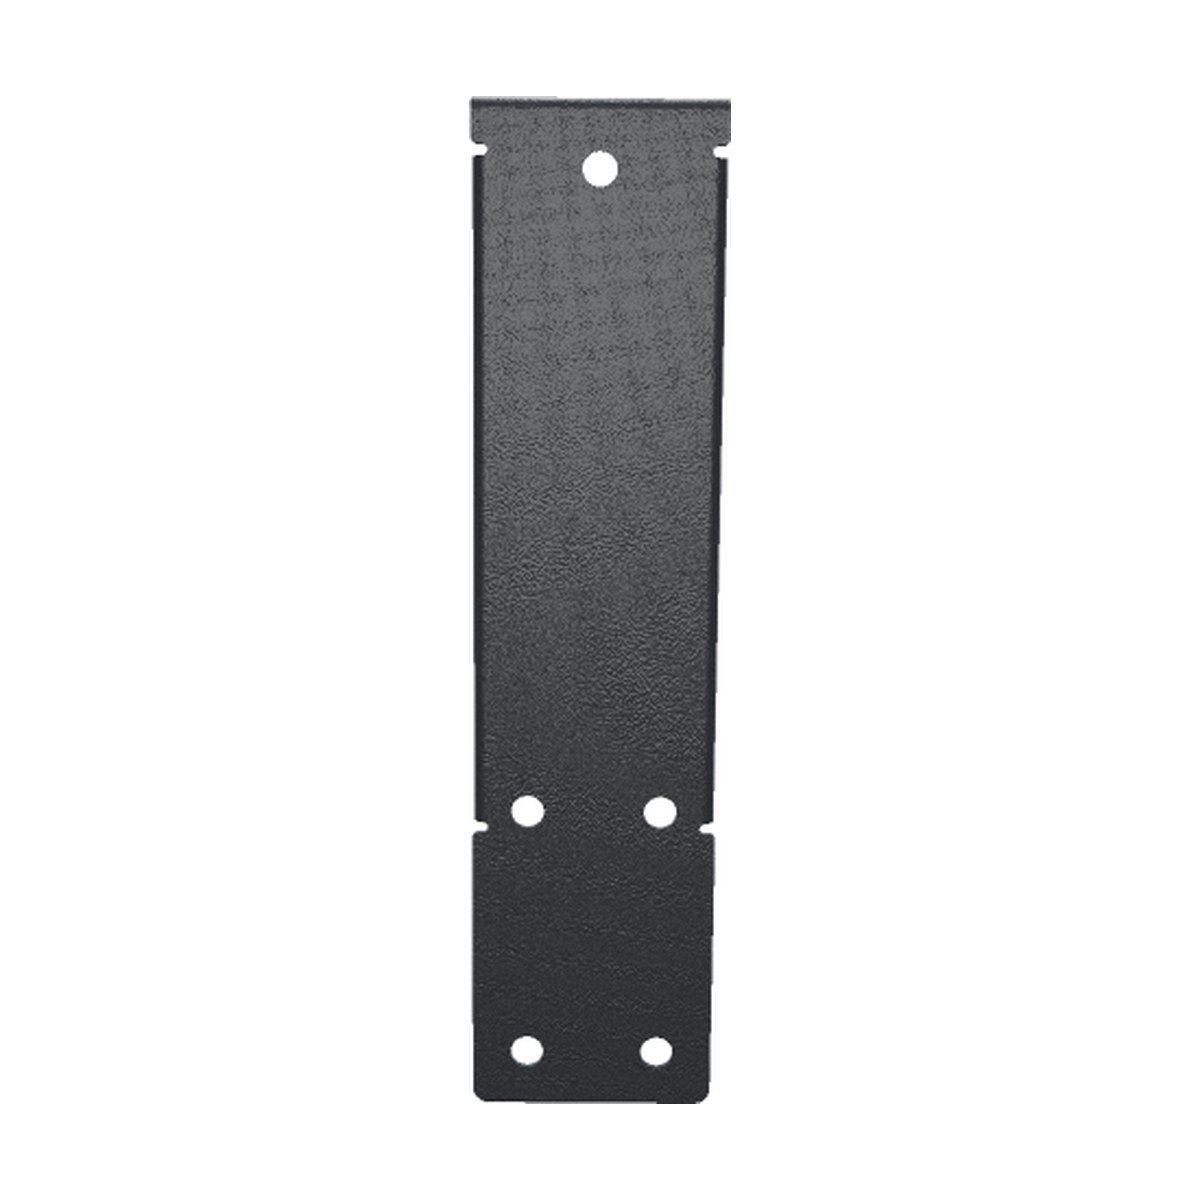
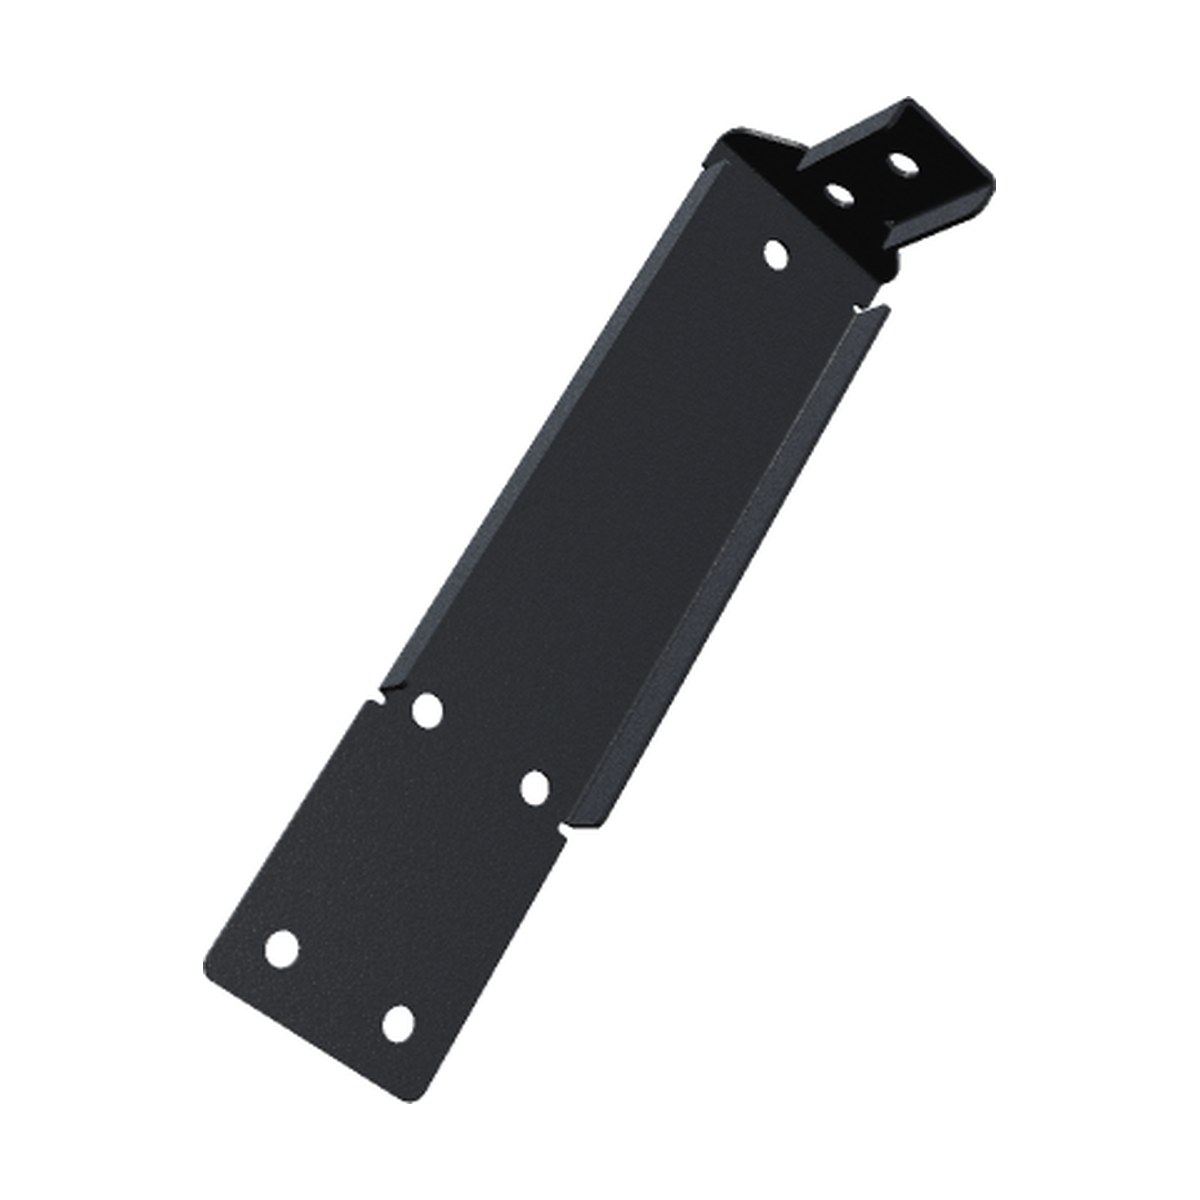
- Formed from a single piece of 14 gauge steel, with no welds to crack
- Stiffening side flanges and a flared top keep it rigid at just 0.96 lb each
- Wrinkle-finish black powder coat, matched to black T-slot rails
Four brackets plus crossbars form a raised frame. Mount one bracket at each corner of your rack at the positions you want, span them with crossbars, and bolt your solar panels to the crossbars.
Specs
The details
| Lift height | 7-13/16" from your top rail’s mounting slot to the top of the bracket (nearly 8") |
|---|---|
| Fits | T-slot rail systems with two horizontal, parallel rails spaced 2-7/8" apart, center to center |
| Steel | 14 gauge (0.0747"), formed from one piece |
| Finish | Wrinkle black powder coat |
| Weight | 0.96 lb per bracket (3.84 lb per set of four) |
| Design load | 30 lb per bracket |
| Recommended maximum | 60 lb per set of four, including panels, crossbars, and hardware |
| Mounting holes | Sized for standard 5/16" bolts, with a little extra room for easy alignment. Four per bracket attach to your rails. Two at the top attach the crossbar. |
| Set includes | 4 brackets. Crossbars and hardware sold separately. |
Before you buy: check your rack
- Your rack is the limit. Add up the weight of the panels, crossbars, fasteners, and brackets, then confirm the total is within your rack’s rated load. Use its dynamic (driving) rating if it has one.
- Leave a generous margin. A raised platform puts more leverage on your rack than flat-mounted gear. Wind, cornering, and braking all add load.
- Secure your panels against wind lift. These brackets carry the platform and aren’t rated for wind uplift on panels.
- Check A/C clearance. Measure your A/C unit’s height above your topmost side rail. The crossbars sit nearly 8" above it, so the unit must clear them. More clearance means better airflow and less heat reaching your panels.
- Maintain it. Check all fasteners regularly and retighten after the first 100 miles. Install and use at your own risk.
What you’ll also need (not included)
Crossbars, bolts, and panel hardware
Crossbars. These span the brackets and hold your panels. Use any T-slot crossbar that fits your setup. If you have a Black River rack, their B-Van Roof Rack Cross Rail is one option. Choose the length and vehicle that match your rack. Many crossbars include mounting bolts, but not all do, so confirm yours come with bolts that fit the bracket’s top holes, or buy them separately.
T-bolts, washers, and nuts for the rails. A set of four brackets uses 16 standard 5/16" T-bolts to attach to your rails. They must fit your rack’s T-slots. If you have a Black River rack, their T-bolts are made for it. They come in packs of 10 with washers and nuts, so you would need two packs.
Panel mounting hardware. Use whatever suits your solar panels.
Fitment
Will it fit my rack?
Fits any double T-slot roof rack with two horizontal, parallel rails spaced 2-7/8" apart, including Black River by Summit racks. Black River offers roof rack components for Airstream Interstate, Coachmen Nova, Entegra (Jayco) Launch, Jayco Terrain, Tiffin Cahaba/GH1, Winnebago (Bolt, Era, EKKO, Revel, Travato), and RAM ProMaster class B vans. Confirm your rail spacing before you order.